Post
Submit Post
Create Component
About
Log In
Sign Up
Post
Submit Post
Create Component
About
Log In
Sign Up
It's kinda like Reddit. But speech is free.
Don't break laws and stay remotely on topic.
You can add components to posts.
You can edit the code of posts.
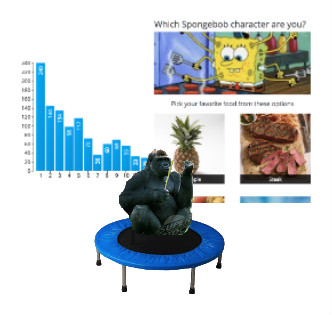
Switch Image Meme Component
Donut Pie Graph Component
And much more
Have an idea? Anyone can make a component!
View Component Demo
Hide
Trending
Top
Most Viewed
Newest
Oldest
6
I spent a year building a computer and made a video about it!
Computer Build, hackentosh
I made a video about building my latest PC! It's a dual booting hackentosh stuffed into a 20 year old mac case. Check it out!
@sporp
1369 views
6/27/2019
4
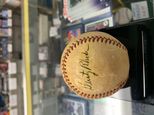
Signed Baseball
Sports
Dusty Rhodes signed baseball
@sportsguy_1953
712 views
6/25/2019
2
MLB Comments
Sports
Seeing the Phillies get swept by the lowly Marlins and continuing their losing streak makes my day and week. this comes from a lifelong Phillies fan since 1960 and if major changes aren't made ASAP i'm afraid this losing will continue.
@sportsguy_1953
798 views
6/24/2019
3
Using large fireworks in a school play. What could go wrong?
Funny
@abcdefghijklmnopqrst
706 views
6/24/2019
1
Weather
Colorado
I know it's the second day of summer but it feels like fall and autumn are still with us here. We're not even out of the 50's today. Gotta love livin in the Rockies b/c ya never know what kind of weather you're gonna get from day to day.
@sportsguy_1953
405 views
6/22/2019
5
Ripped jeans finally make sense
19th Century Memes, Funny
@MakeNoLaw
1438 views
6/20/2019
0
Humor
humor
@sportsguy_1953
288 views
6/20/2019
2
Test showing how an infinite loop is prevented
JavaScript
Click "VIEW SOURCE" to see the infinite loop that doesn't break this page. Below is how the javascript code is written, and the resulting output from Babel. It is not perfect yet, but essentially we track each function, and throw an error when certain conditions are met. The conditions are fairly easy to meet, so it's actually somewhat difficult to bypass. If you do find a way to bypass it, let us know how in the comments! <script> function a() { a(); } a(); </script> <script> "use strict"; function a() { zhuqhisgphh_ks_3('__zhuqhisgphh'); a(); zhuqhisgphh_ks_3('__zhuqhisgphh', "end"); } a(); </script>
@MakeNoLaw
381 views
6/18/2019
2
MLB Comments
Sports
Yes i know it's still early in the season but i feel the Phillies are in a free fall right now and they had better hope it doesn't last for the rest of their season.
@sportsguy_1953
532 views
6/17/2019
2
Humor
humor
Mondays
@sportsguy_1953
435 views
6/17/2019
2
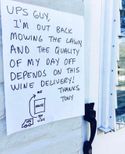
Wine is that important
19th Century Memes, Funny
@abcdefghijklmnopqrst
336 views
6/15/2019
1
Life
Life
Just another ho hum Friday
@sportsguy_1953
408 views
6/14/2019
3
Colorado Living
Photos
Had to take this shot looking west towards Pikes Peak this morning from Garden of the Gods Park.
@sportsguy_1953
1452 views
6/13/2019
0
MLB Comments
Sports
The next series for the Phillies starting tomorrow in the ATL will be a very big and inportant series for them. And if Gabe Kapler isn't on the hot seat yet he defity should be starting with this series.
@sportsguy_1953
293 views
6/13/2019
0
Sports comments
Sports
I have a sneaking feeling that Tiger Woods just might suprise and win his 16th Major this weekend at the U.S. Open at Pebble Beach. And again Hefty Micklefat ewill once again come up short is his quest to try and win his first U.S.Open
@sportsguy_1953
331 views
6/13/2019
1
Politics
Politics
The hearing today in D.C. was a total joke and a big waste of time and tax dollars.
@sportsguy_1953
402 views
6/11/2019
1
Mlb comments
Sports
Phillies are doing really really bad tonight and i don't see them being much better anytime soon.
@sportsguy_1953
425 views
6/11/2019
1
MLB Comments from Colorado
Sports
Rockies are back home for 7 against the CUBS and PADRES. I'll be attending two against SD.Go ROX!
@hardman1
371 views
6/10/2019
1
Trying to break an ice window
19th Century Memes, Funny
@abcdefghijklmnopqrst
430 views
6/10/2019
2
MLB Comments from Colorado
Sports
We all know Cody Bellinger, Christian Yelich and Nolan Arenado are having great years in the N.L. Guess who right now easily leads the A.L. in WAR? MIKE TROUT, of course. We all know he's the best player in baseball and yet he's almost UNDERRATED because he does it year after year out in Anaheim. He's SO much more consistent and better than everyone else he's actually underrated.
@hardman1
358 views
6/10/2019
1
MLB Comments from Colorado
Sports
Two players who should NOT be in the HOF. Tony Perez and Harold Baines. Perez hit .279 lifetime and never lead the league once in anything. Ever. Way short of 400 homers, he was lucky he was the sixth best player on some great teams, if he played somewhere like Houston nobody would care about him, except that he was a good player like a Dwight Evans or Willie Horton. Do I even have to bring anything up about Baines? Ugh. Rockies beat the CUBS yesterday and head to Citifield.
@hardman1
555 views
6/10/2019
4
MLB comments from Colorado
Sports
The Colorado ROCKIES had won 8 straight heading into Wrigley Field on Tuesday June 4. After losing Wed.night 9-8 to the CUBS, the ROCKIES need to win Thursday to break a 2 game losing streak.Let's go ROCKIES!
@hardman1
764 views
6/6/2019
4
Toronto beats Golden State on the road discussion
NBA
Golden State was down Klay and KD, so it's no surprise to me. Toronto did what the had to do, and now they hold the keys even if Klay and Durant come back. Fred Vanvleet has been spectacular recently, even though he only had 11 points this game. Once the highlights are ready, I'm going to update this post with the game and Vanvleet's highlights, as well as some stats. Vanvleet just makes good decision after good decision and deserves some recognition here.
@keving
1165 views
6/6/2019
2
Just be ugly
19th Century Memes
@abcdefghijklmnopqrst
579 views
6/6/2019
4
Elephant poaching has decreased due to waning ivory demand
Science is fucking lit, Science
This is partly due to China's decision to ban ivory sales in 2017. 8 years ago 10% of the African elephant population was decimated in one year as a result of poaching. Now that number is approaching 4%. Here's the link describing the study in Nature Communications : http://blogs.discovermagazine.com/d-brief/2019/06/03/elephant-poaching-is-decreasing-as-ivory-demand-slows/
@bigboy
1496 views
6/5/2019
First
Previous
Next